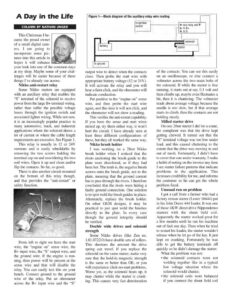
A Day in the Life This Christmas I be- came the proud owner of a small digital cam- era. I am going to incorporate some pic- tures into this article in hopes it will enhance bea® your look into one of the common days at my shop. Maybe some of your chal- lenges will be easier because of these things I’ve already run across. Nikko anti-restart relay Some Nikko starters are equipped with an auxiliary relay that enables the “S” terminal of the solenoid to receive power from the large B+ terminal wiring, rather than suffer the possible voltage losses through the ignition switch and associated lighter wiring. While not new, it is an increasingly popular practice in many automotive, truck, and industrial applications where the solenoid draws a lot of current or where the cable length requirements are excessive. See Figure 1. This relay is usually in 12 or 24V versions and is easily rebuildable by removing the two screws holding the terminal cap on and unsoldering the two coil wires. Open it up and clean and/or flip the contacts. So far, so good. There is also another circuit mounted on the bottom of this relay though, and that provides the “anti-restart” or safety function. From left to right we have the start wire, the “engine on” sense wire, the B+ input wire, the “S” output wire, and the ground wire. If the engine is run- ning, then power will be present at the sense wire and that will disable the relay. You can easily test this on your bench. Connect ground to the ground wire of the relay. Put an ohmmeter across the B+ input wire and the “S” to ignition switch Figure 1—Block diagram of the auxiliary relay wire routing € aux relay coil T output wire to detect when the contacts close. Then probe the start wire with appropriate battery voltage (12 or 24V). It will activate the relay and you will hear a faint click, and the ohmmeter will indicate conduction. Put positive to the “engine on” sense wire, and then probe the start wire again, and this time it will not click, and the ohmmeter will not show a reading. This verifies the anti-restart capability. If you have the sense and start wires mixed up, try them either way, it won’t hurt the circuit. I have already seen at least three different configurations of these, but they all worked the same way. Nikko brush holder I was working on a 28mt Nikko brush holder when I noticed that the rivets anchoring the brush guide to the plate were discolored, as if they had been hot. The truth is, the negative brush screws onto the brush guide, not to the plate, meaning that the ground current has to pass through the rivets. I therefore concluded that the rivets were hiding a faulty ground connection. One solution is to spot weld the brush guides in place. Alternately, replace the brush holder. On other OEM designs, it may be practical to just spot weld the brushes directly to the plate. In every case though the ground integrity should be verified. Double wide drives and solenoid strength Some Nikko drives (like Zen no. 1.01.0722.0) have double sets of rollers. This shortens the amount the drive spring can travel. If you replace the solenoid on the same starter, make very sure that the hold-in magnetic strength is the same or better than OE, or you will experience click-no-start problems. Worse yet, as the solenoid heats up, it may chatter while the starter is crank- ing. This causes very fast deterioration of the contacts. You can see this easily on an oscilloscope, or else connect a voltmeter across the two main bolts of the solenoid. If while the starter is free running, it starts out at say, 0.1 volt and then climbs up, maybe even fluctuates a bit, then it is chattering. The voltmeter reads about average voltage because the needle is too slow, but if that average starts to climb, then the contacts are not holding steady. Milled starter drive On one 28mt starter I did for a crane, the complaint was that the drive kept getting chewed. It turned out that the “S” terminal voltage was too low under load, and this caused chattering to the extent that the drive was moving in and out of mesh. Fortunately, I didn’t have to cover that one under warranty. I make a habit of noting on the invoice any time I see starter failure patterns that indicate problems in the application. This increases credibility for me, and informs the customer so he can get the whole problem fixed. Unusual run on problem I got a call from a farmer who had a factory reman starter (Lester 16644) put in his John Deere 444 loader. It was one of those 4K W direct drive Nippondenso starters with the shunt field coil. Apparently the starter worked great for a few months until he ran his machine out of fuel one day. Then when he tried to restart his loader, the starter wouldn’t release when he let go of the key. It just kept on cranking. Fortunately he was able to get the battery terminals off quickly so he didn’t damage the starter. What the problem was not: ethe solenoid contacts were not welding together like in a