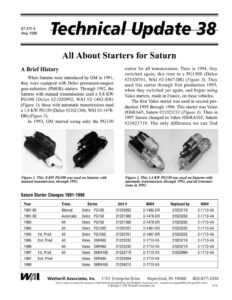
87-375-4 May 1998 All About Starters for Saturn A Brief History starter for all transmissions. Then in 1994, they ; ; switched again, this time to a PG150S (Delco When Saturns were introduced by GM in 1991, #21020761, WAI #2-1467-DR) (Figure 3). They they were equipp ed with Delco permanent-magnet used this starter through first production 1995, gear-reduction (PMGR) starters. Through 1992, the when they switched yet again, and began using Saturns with manual transmissions used a 0.8 KW Valeo starters, made in France, on these vehicles. PG100 (Delco #21020892, WAI #2-1482-DR) The first Valeo starter was used in second pro- (Figure 1); those with automatic transmissions used duction 1995 through 1996. This starter was Valeo a 1.4 KW PG150 (Delco #21021366, WAI #2-1478- un 6RA65, Saturn #21023232 (Figure 4). Then in DR) (Figure 2). 1997 Saturn changed to Valeo #1D6RA165, Saturn In 1993, GM started using only the PGIS50 #9 1923719. The only difference we can find – Figure 1. This .8 KW PG100 was used on Saturns with Figure 2. This 1.4 KW PG150 was used on Saturns with manual transmission, through 1992. automatic transmission, through 1992, and all transmis- sions in 1993. Saturn Starter Changes 1991-1998 Year Trans. Series Unit # WAI# Replaced by WAI# 1991-92 Manual Delco PG100 21020892 2-1482-DR 21023719 2-1713-VA 1991-92 Automatic Delco PG150 21021366 2-1478-DR 21023232 2-1713-VA 1993 All Delco PG150 21021366 2-1478-DR 21023232 2-1713-VA 1994 All Delco PG150S 21020761 2-1467-DR 21023232 2-1713-VA 1995 = 1st. Prod All Delco PG150S 21020761 2-1467-DR 21023232 2-1713-VA 1995 2nd. Prod All Valeo D6RA65 21023232 2-1713-VA 21023719 2-1713-VA 1996 All Valeo D6RA65 21023232 2-1713-VA 21023719 2-1713-VA 1997 1st. Prod All Valeo D6RA165 21023719 2-1713-VA 21023994 2-1713-VA 1997 2nd. Prod Valeo D6RA85 21023994 2-1713-VA 1998 Valeo D6RA185 21024210 2-1713-VA y fai | Wetherill Associates, Inc. 1101 Enterprise Drive Royersford, PA 19468 800-877-3340 Care is taken to ensure the accuracy of information presented here, but Wetherill Associates, Inc., assumes no responsibility for possible errors. Copyright © 1998 Wetherill Associates, Inc. 6176 Technical Update 38 page 2 Figure 3. This PG150S with bolt-on solenoid was used in 1994 Saturns, through first production 1995. Figure 4. Valeo starters were used on Saturns beginning with second production 1995, through 1998. between the D6RA65 and the D6RA165 is in the length of the battery terminal on the solenoid: the terminal on the D6RA165 is 6mm shorter than the terminal on the D6RA6S. These starters both use all the same components, are completely interchange- able and can replace all the earlier Delco starters. Then during 1997 Saturn changed these Valeo starters twice — first to a D6RA8S5, then to a D6RA185. The D6RA185 was also used in 1998 models. These two late-model starters can replace all the Delco starters and both of the earlier Valeo starters. However, they use a different armature, planetary gear, stationary gear and planetary-gear cover than the two earlier Valeo units. These four components are not individually interchangeable 5008 Or Figure 5. These components for late-model Saturn can be interchanged if they are kept together as a group. On the left are stationary gear, planetary gear and armature for starters D6RA65 and D6RA165. On the right are the same components for D6RA85 and D6RAI85. with the components of the earlier versions. However, if these four components are kept together, they can be interchanged as a group. Here are the components that must be kept together when you are rebuilding these units (Figure 5): Valeo starters D6RA65 and 165 use a White stationary gear 59 teeth Planetary gears 22 teeth Armature 13 teeth Starters D6RA85 and 185 use a Black stationary gear 37 teeth Planetary gears 15 teeth Armature 8 teeth See the table on page I for a summary of all the changes made to Saturn starters. Rebuilding Valeo for 1995 Saturn When disassembling this starter, first remove the three D.E.-housing screws and the one sole- noid-attaching screw. Then you can remove the DE housing. This will reveal two more solenoid attaching screws that must be removed in order to remove the solenoid (Figure 6). Figure 6. Remove three D.E.- housing screws and one solenoid-attaching screw to remove the D.E. housing on this Valeo starter. This will reveal two more screws that must be removed in order to remove the solenoid. You will notice that there are two rivets that attach the center plate to the motor assembly. These must be removed to further disassemble the starter. The shift-lever pivot pin is a slip fit and will fall out very easily, so be careful not to lose it (Figure 7). Technical Update 38 page 3 After removing the starter drive stop collar and wire ring, you can disassemble the drive and plan- etary gear assembly. Figure 7. The shift- lever pivot pin is a slip fit and will fall out = easily, so be careful not to lose it. To disassemble the motor assembly, remove the two small nuts and washers that attach the C.E. cover. With the cover removed you will expose the brush holder assembly (Figure 8). Figure 8. When you remove the C.E. cap, you will see this brush-holder assem- bly. Don’t try to remove it until you release the lock tab holding the spring in place. (See Caution) This brush-holder assembly is unique in that it has only one brush spring pushing on both the pos- itive and negative brushes. With closer inspection you will notice a small insulating pad on top of each brush (Figure 9). Caution: Don’t try to remove the brush-holder assembly at this time, even though it seems like it will come right off, or you will break it. You must first remove the spring, as follows: The center of the brush spring locks under a tab on the motor case. But before you release this tab, keep in mind that the spring comes out with so much force it can travel at least 20 feet before the Figure 9. This unique brush holder has only one brush spring that must be removed with caution. It also features two small insulating pads. first bounce. So, before releasing the tab, run a piece of string or wire through the coils of the spring. If you don’t secure the spring in this way, you may cause eye damage and will most definite- ly need to buy a new spring. Figure 10. Once the brush holder is removed, you will see a small cap that must be pried off to get to the retaining = clip for the _ armature. Once the brush holder is removed, it will expose a small cap that can be pried off to get to the retaining clip for the armature (Figure 10). Also remove the shims for adjusting the end-play of the armature. Once the armature is removed you should remove the spacer from the commutator end of the armature so it does not get lost. You will notice some very small parts in this series of starters. In fact the size of the entire motor case in not much larger than a 10MT sole- noid case.