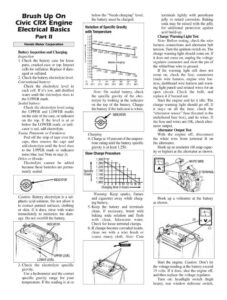
Brush Up On Civic CRX Engine Electrical Basics Part Il below the “Needs charging” level, the battery must be charged. Honda Motor Corporation Battery Inspection and Charging Inspection 1. Check the battery case for loose parts, cracked case or top. Inspect cells for sulfation. Replace if dam- aged or sulfated. 2. Check the battery electrolyte level. Conventional battery: Check the electrolyte level in each cell. If it’s low, add distilled water until the electrolyte rises to the UPPER mark. Sealed battery: Check the electrolyte level using the UPPER and LOWER marks on the side of the case, or indicator on the top. If the level is at or below the LOWER mark, or indi- cator is red, add electrolyte. Yuasa, Panasonic or Furukawa: Peel off the strip of tape over the caps, then remove the caps and add electrolyte until the level rises to the UPPER mark or indicator turns blue (see Note in step 3). Delco or Honda: Electrolyte cannot be added because these batteries are perma- nently sealed. Variation of Specific Gravity with Temperature 1304 43005 4.2970 ‘ 1.2935 4099 : 1.2865 1.283 1.284 1.2805 4.9779 aoe 1.2630 | (Needs charging) 1.200 4.1965 °c 0° 5° 10° 15° 20° 25° 30° (PF) (32°) (41°) (60°) (59°) (68°) (77°)_—(86″) Note: On sealed battery, check the specific gravity of the elec- trolyte by looking at the indicator on the top of the battery. Charge the battery if the indicator is white. ose INDICATOR WF Charging 4. Charge at 10 percent of the ampere- hour rating until the battery specific gravity is at least 1.250. lao INDICATOR C7 Slow Charge Procedure 1,300 1,260 1,220 Specific 1,180 Gravi 1,140 | 1,100 1,060 Tie 18 terminals lightly with petroleum jelly to retard corrosion. Baking soda may be mixed with the jelly for additional protection against acid build-up. Charge Warning Light Test Note: Before testing, check the wire harness connections and alternator belt tension. Turn the ignition switch on. The charge warning light should come on. If it does not come on, unplug the voltage regulator connector and short the pin of the white/blue wire to ground. If the warning light still does not come on, check the fuse, connectors (main wire harness, engine wire har- ness, dashboard wire harness and warn- ing light panel) and related wires for an open circuit. Check the bulb, and replace it if burned out. Start the engine and let it idle. The charge warning light should go off. If it stays on all the time, check the “alternator sensor’ fuse (located in the underhood fuse box), and its wires. If the fuse and wires are OK, check alter- nator output. Alternator Output Test With the engine off, disconnect the white wire from terminal B on the alternator. Hook up an ammeter (60 amp capac- ity or higher) at the alternator as shown. Charging time in hours ————* Caution: Battery electrolyte is a sul- phuric acid solution. Do not allow it to contact painted surfaces, clothing or skin. If it does, rinse with water immediately to minimize the dam- age. Do not overfill the battery. i INDICATOR ~~. yy, (7: KR UPPER LEVEL LOWER LEVEL Warning: Keep sparks, flames and cigarettes away while charg- ing battery. . Keep the battery and terminals clean. If necessary, brush with baking soda solution and flush with clean, lukewarm water. Check for loose terminal clamps. . If clamps become corroded inside, clean out with a wire brush or coarse emery cloth. Note: Coat Nn lon 3. Check the electrolyte specific gravity. Use a hydrometer and the correct specific gravity range for your temperature. If the reading is at or Hook up a voltmeter at the battery as shown. Start the engine. Caution: Don’t let the voltage reading at the battery exceed 19 volts. If it does, shut the engine off, and then replace the voltage regulator. Turn on: headlight switch (high beam), rear window defroster switch,