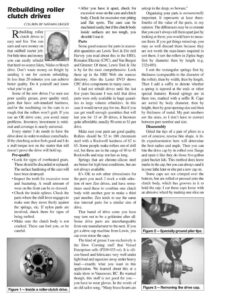
Rebuilding roller clutch drives COLUMN BY NATHAN UNGER Rese roller clutch drives is easy and fun. You can earn and save money on that oddball starter job. For little time and money you can easily rebuild === that hard-to-source Iskra, Nikko or Bosch drive. Don’t waste money on freight by sending it out for custom rebuilding. In less than 20 minutes you can achieve better quality. Do it yourself and know what you’ve got. Some of the new drives I’ve seen use poor quality grease, poor quality steel, parts that have sub-standard hardness, and/or the machining on the cam is so rough that the rollers won’t grab. If you use an OE drive core, you avoid many problems. Inventory investment is mini- mal and coverage is nearly universal. Every starter I do needs to have the drive done in order to reduce comebacks. If the clutching action feels good and I do a stall torque test on the starter that still doesn’t prove the drive will hold up. Pre-qualify ¢ Look for signs of overheated gears. These should be discarded or replaced. The surface hardening of the cam will have been destroyed. * Inspect the teeth for excessive wear and fracturing. A small amount of wear on the front can be re-dressed. ¢ Check the inside splines. Check the parts where the shift lever engages to make sure they move freely against the springs, etc. If nylon parts are involved, check them for signs of being melted. e Make sure the clutch body is not cracked. These can fool you, so be careful. Figure 1— Inside a roller-clutch drive. ¢ After you have it apart, check for excessive wear on the cam and clutch body. Check for excessive rust pitting and flat spots. The cam can be machined easily, but if the clutch body inside surfaces are too rough, you shouldn’t use it. Parts Some good sources for parts in reason- able quantities are Lewis Tool & Die (tell Harvey you read about this in the ERE), Romaine Electric (CPC), and Van Bergen and Greener. Of these, Lewis Tool & Die is by far the most comprehensive. Look these up in the ERE Web site sources directory. Also the Lester DVD shows CPC drive components in many cases. I had not rebuilt drives until the last five years because I was told that drive parts were only available in huge quanti- ties to large volume rebuilders. In this case it would never pay for me. But if you can get small enough quantities that will last you for 15 or 20 drives, it becomes quite affordable, usually 50 cents to $1 per drive. Make sure your parts are good quality. Rollers should be 52 to 100 chromium steel with a Rockwell hardness of 62 to 65. Some people make rollers out of drill rod, but these are in the range of 40 to 45 Rockwells and may not last as long. Springs that are chrome-silicon steel are better for high heat conditions, but are not always available. It’s OK to rob other drives/cores for the parts you need. I stock a wide selec- tion of new Zen drives, and have some- times used these to combine one clutch body with another gear to make a third part number. Zen tends to use the same size internal parts for a similar size of drive. That barrel of drive cores you have may turn out to be a goldmine after all. Some drive parts are interchangeable from one manufacturer to the next. If you get a drive cap machine from Lewis, you can even reuse the caps. The kind of grease I use exclusively is the Dow Corning stuff that Vensel Enterprises sells (P209-033-02). It is sili- con based and lubricates very well under light load and squeezes away under heavy load—exactly what you want in this application. We learned about this at a trade show in Vancouver, BC. Be warned though, this stuff is not good for you— you have to wear gloves. In the words of an old sailor song, “Many brave hearts are asleep in the deep, so beware.” Organizing your parts is monumentally important. It represents at least three- fourths of the value of the parts, in my opinion. The differences may be so minute that you can’t always tell them apart just by looking at them; you would have to meas- ure them. If you get things mixed up, you may as well discard them because they are not worth the man-hours required to sort them. I sort the rollers in Ziploc bags first by diameter then by length (e.g. 232×485). I sort the rectangular springs first by thickness (comparable to the diameter of the roller), then by width, then by length. Then I add a suffix to denote whether a spring is tapered at the ends or other special features. Round springs are in there too, marked with a suffix R. Caps are sorted by body diameter, then by height, then by gear opening size and then by thickness of metal. My part numbers are the sizes, so I don’t have to convert between part number and size. Disassembly Grind the tips of a pair of pliers to a sort of concave, reverse bite shape. A lit- tle experimentation here will determine the best radius and angle. Then you can bite the drive cap by its rolled over flange and open it like they do those five-gallon paint bucket lids. This meth