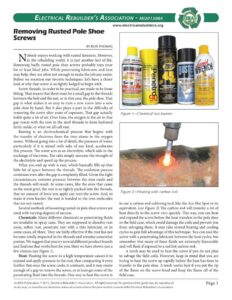
ELecTRICAL REBUILDER’S ASSOCIATION – MI201308A www.electricalrebuilders.org Removing Rusted Pole Shoe Screws BY BOB THOMAS New enjoys working with rusted fasteners. However, in the rebuilding world, it is just another fact of life. Removing badly rusted pole shoe screws probably tops your list of least liked jobs. While penetrating lubricants and heat may help, they are often not enough to make the job any easier. Before we mention our favorite techniques, let’s have a closer look at why that screw is so tightly lodged to begin with. Screw threads, in order to be practical, are made to be loose fitting. That means that there must be a small gap in the threads between the bolt and the nut, or in this case, the pole shoe. That gap is what makes it so easy to turn a new screw into a new pole shoe by hand. But it also plays a part in the difficulty of removing the screw after years of exposure. That gap actually holds quite a bit of air. Over time, the oxygen in the air in that gap reacts with the iron in the steel threads to form hydrated ferric oxide, or what we all call rust. Rusting is an electrochemical process that begins with the transfer of electrons from the iron atoms to the oxygen atoms. Without going into a lot of detail, the presence of water, particularly if it is mixed with salts of any kind, accelerates this process. The water acts as an electrolyte, which aids in the exchange of electrons. The salts simply increase the strength of the electrolyte and speed up the process. What you end up with is rust, which basically fills up that little bit of space between the threads. The oxidation process continues even after the gap is completely filled. Given the right circumstances, extreme pressure between the iron oxide and the threads will result. In some cases, like the ones that cause us the most grief, the rust is so tightly packed into the threads, that no amount of force you apply can turn the screw. And, to make it even harder, the rust is bonded to the iron molecules that are not rusted. Several methods of loosening rusted-in pole shoe screws are used with varying degrees of success. Chemicals: Many different chemicals or penetrating fluids are available in spray cans. They are supposed to dissolve rust away, soften rust, penetrate rust with a thin lubricant, or in some cases, all three. They are fairly effective if the rust has not become totally impacted in the threads and remains somewhat porous. We suggest that you try several different product brands and find one that works best for you. Here we have shown just a few choices (see Figure 1). Heat: Heating the screw to a high temperature causes it to expand and apply pressure to the rust, thus compacting it even further. But once the screw cools, it contracts, and it may create enough of a gap to remove the screw, or at least get some of the penetrating fluid into the threads. One way to heat the screw is PENETRATING LUBRICANT WITH AND VYOA! Figure 2—Heating with carbon rod. to use a carbon-rod soldering tool, like the Ace Hot Spot or its equivalent. (see Figure 2) The carbon rod will transfer a lot of heat directly to the screw very quickly. This way, you can heat and expand the screw before the heat transfers to the pole shoe or the field case, which could damage the coils and prevent you from salvaging them. It may take several heating and cooling cycles to gain full advantage of this technique. You can cool the screw with a penetrating lubricant between the heat cycles, but remember that many of these fluids are extremely flammable and will flash if exposed to a red hot carbon rod. A torch may be used to heat the screw if you do not plan to salvage the field coils. However, keep in mind that you are trying to heat the screw up rapidly before the heat has time to transfer to the pole shoe. A torch works best if you put the tip of the flame on the screw head and keep the flame off of the field case. An ERA Publication. © 2013, Electrical Rebuilder’s Association. All rights reserved. No portion of the guide may be reproduced Page | in any way, or stored in any electronic retrieval system without the prior written consent of the Electrical Rebuilder’s Association. ELECTRICAL REBUILDER’S ASSOCIATION – MI201308A www.electricalrebuilders.org Impact Driver: There are times when none of the previous methods are enough to break the screw loose. Many of you already know that another method to loosen that rusted screw is to mechanically shock it. Most pole shoe screws are countersunk. (see Figure 3) This means that the head of the screw has a beveled edge that mates to a beveled recess in the top of the bolt hole in the field case. If you strike the head of the screw hard enough, driving it down into the case, the shock will slightly reform the screw, moving the beveled edge closer to the top and lengthening the shank by the same amount. This relieves some of the pressure working against removal, because the pole shoe is actually moved slightly away from the case. In addition, the shock travels down the length of the screw and into the threads themselves. A hand impact driver is designed to do just that, while also applying a twisting force to the head of the screw at the same time. (see Figure 4) However, the downside of the hand impact driver is that the force of the blow must pass through a bit, which, even in the best of fits in the screw head, cannot transfer all of the force. For maximum effect, you actually need three tools: a hand impact driver, a really big hammer and a hardened steel rod almost as large in diameter as the head of the screw you are trying to loosen. (see Figures 5 and 6) We have found that a dead blow ball peen hammer and a piece of armature shaft make a good team to create a little space in the rust-impacted screw threads. The head of a dead blow hammer is filled with lead shot or sand, both of which absorb the impact of the strike to reduce rebounding and concentrate all of the impact energy of the blow at one focal point. The hardened steel hammer head and shaft are both harder than the screw and ensure that all of the energy is transferred directly onto the screw’s head. The hammer in our photo is a 32 oz. Snap-On model HDDB-32. Snap-On and other tool suppliers offer this type of hammer in a variety of sizes, both smaller and larger. We found that this size is just right for an average-sized adult. The armature shaft in the photo was cut from a Prestolite armature shaft, but a Lester armature #2003 Ford shaft would work just as well. You want the shaft to be long enough to be held safely but not too long to control, if the hammer strike were to be slightly off. Delivering an accurate blow with this large of a hammer takes practice. Don’t start out by swinging the hammer as hard as you can. Accuracy is more important than hammer speed. The science behind using a hammer is the same as that of swinging a golf club, a baseball bat, or arms and legs in martial arts. You have to relax at the point of impact to let all of the energy flow from the hammer to the shaft. In this case, the shaft must be held tightly against the screw head at the same time. In addition, for this technique to work, the shaft must be held in alignment with the screw, square to the field case, and the hammer must strike the shaft square, too. In most cases, two Diet eetge ian ee, ge Figure 3—A typical screw and case Figure 4—Using hand impact driver Figure 5—Tool made from armature shaft An ERA Publication. © 2013, Electrical Rebuilder’s Association. All rights reserved. No portion of the guide may be reproduced Page 2 in any way, or stored in any electronic retrieval system without the prior written consent of the Electrical Rebuilder’s Association.